The Add New Substrate guides you to work out the best settings for your substrate. It ƭirst requests some information about the substrate and your intended use of it, then prints some test prints and asks you to evaluate them. From this information, it creates new preset.
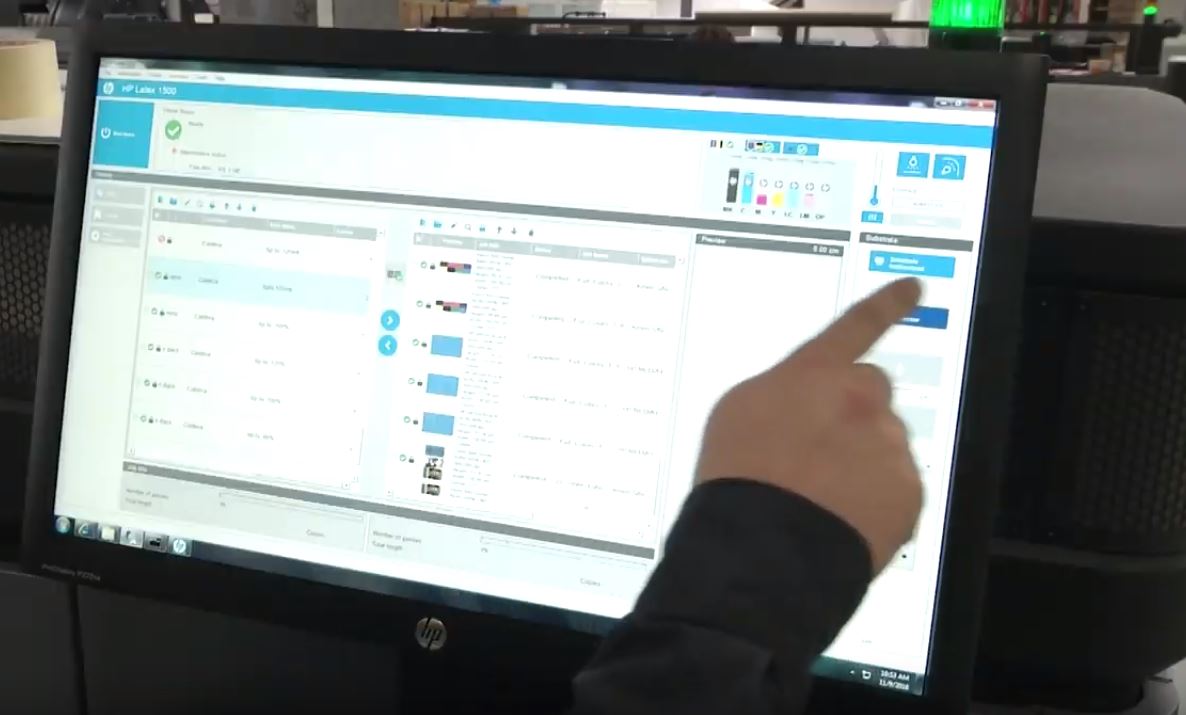
To use the wizard, ƭirst ensure that the new substrate is loaded in the roll-to-roll conƭguration, then go to the Internal Print Server, select the Substrate tab, and then Create.
Material
The ƭirst question from the wizard asks for the primary material of which your substrate is made:
- Self-Adhesive Vinyl includes cast self-adhesive vinyl, calendered self-adhesive vinyl, perforated self-adhesive vinyl, transparent self-adhesive vinyl, and reflective self-adhesive vinyl.
- PVC Banner includes a frontlit banner, backlit banner, scrim banner, scrimless banner, mesh banner with liner, blockout banner, truck curtain banner, tarpaulin, and PVC wall covering.
- Paper includes coated paper, uncoated paper, photo paper, photorealistic paper, blue-back paper, paper wall covering or wallpaper, self-adhesive paper, and non-woven wall covering.
- PP & PE Film & Banner include polypropylene (PP) ƭlm, synthetic paper (such as Yupo), Tyvek, and PE or HDPE (polyethylene) banner.
- PET Film includes polyester (PET) backlit ƭlm, polyester (PET) frontlit ƭlm, and polyester (PET) grey-back ƭlm.
- Textile includes polyester textile and fabric, textile banner, backdrops, textile mesh with liner, frontlit textile, backlit textile, canvas, flag and voile *, cotton textile, textile wall covering, self-adhesive textile, and woven wall covering.
Application
The next question asks how you intend to use your substrate.
- Frontlit means that the print will be viewed by light from in front of the substrate.
- Backlit means that the print will be viewed by light from behind the substrate.
Optimized for
The next question asks whether you want to give priority to speed, quality, or neither.
- Print Quality: You want the best possible print quality.
- Print Speed: You want fast printing.
Test print
Next, the wizard shows you the proposed settings for the ƭrst test print. These settings are generated based on the information you have already given.
NOTE: If you are an advanced user and the suggested settings do not meet your expectations, you can select Advanced settings at any time and make manual changes. However, you are recommended to print the ƭrst test print as an indication of overall performance on your substrate.
NOTE: If you cancel the test print because you are experiencing substrate issues or print-quality issues such as banding, consider modifying the substrate preset, following the guidelines provided in Troubleshoot substrate issues and Troubleshoot print-quality issues on the HP Latex 1500 Printer User Guide.
When the test print has been made, the wizard asks you some questions about it.
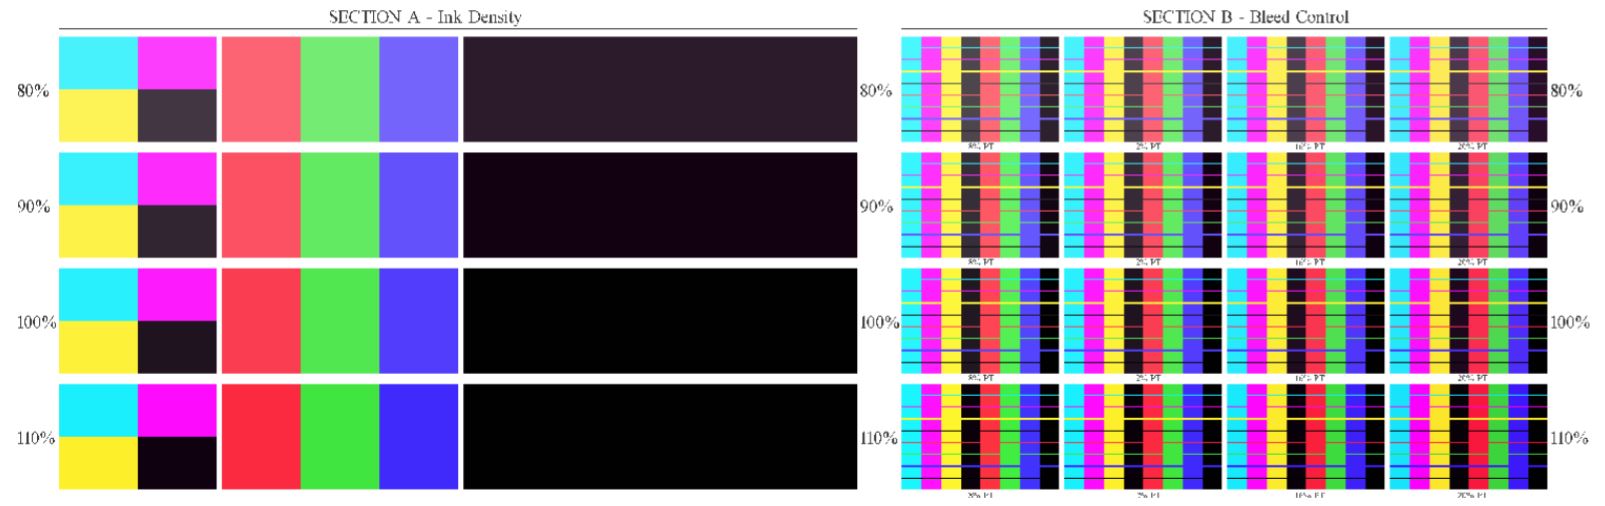
The print is organized into horizontal bands which are printed at a range of diƫerent ink densities. There are two diƫerent sections. The left part (Section A) is focused on color saturation and curing performance. The right part (Section B) is focused on the interaction of several ink densities with diƫerent levels of the optimizer.
Start with Section A. Check whether any of the bands are completely cured. Use the black 4-color patch for this purpose. Do a smudge test if possible. Check whether any curing defects are visible. One possible curing defect appears as a pattern of small round spots on the print, from the perforated plate through which the curing air passes.
- If you have found an ink density that is perfectly cured, choose this or a lower ink density in the Ink Density drop-down menu. Never select an ink density with curing defects. If none of the ink density bands is completely cured, or the ink density you prefer for your application is not cured, select NONE in the Ink Density menu. The wizard then generates another test print with diƫerent settings.
- When you have found a satisfactory ink density, you need to select the best amount of optimizer for this ink density. Within the ink density band you have selected, look at Section B of the print to determine the best amount of optimizer. Look at color-to-color bleed and smooth area ƭlls. If you see several levels of optimizer performing equally well, you are recommended to choose the lowest amount without defects. If you cannot ƭnd any amount of optimizer giving a satisfactory performance with the selected ink density, look at neighboring ink densities (usually lower, but could be higher in some rare cases). Consider changing the selected ink density if there is a combination without defects. If you do so, remember to change the ink density in the drop-down menu.
- Once you have found a good combination of ink density and optimizer, click Next to add the substrate and the printing condition you just selected. You can rename both. In some cases, several printing conditions are oƫered at once. You can deselect the options you are not interested in.
- You are recommended to perform color calibration immediately after completing the wizard, to ensure that the calibration process can cope with the selected ink density.
- The new preset is now loaded into the Internal Print Server. You can print your own test prints or create an ICC proƭle with your RIP software.
TIP: If you need to provide diƫerent printing conditions or change those currently available in the new preset, you can select Edit from the Substrate menu.